Build a Great Nest.js Blog: Reply Comment
Wenhao Wang
Dev Intern · Leapcell

In the previous article, we added a comment feature to our blog, allowing readers to share their thoughts on posts.
However, these comments are one-directional. Others can comment on your posts, but you can't reply to their comments.
To make the comment section more interactive, in this article, we will implement a comment reply feature: users will be able to reply to existing comments, and these replies will be displayed in a nested (or indented) format to show the reply hierarchy.
Step 1: Update the Data Model
To implement the reply feature, we need to establish a parent-child relationship between comments. A reply is essentially a comment itself, but it has a "parent comment." We will achieve this by adding a self-referencing relationship to the Comment entity.
Modify the Database Table
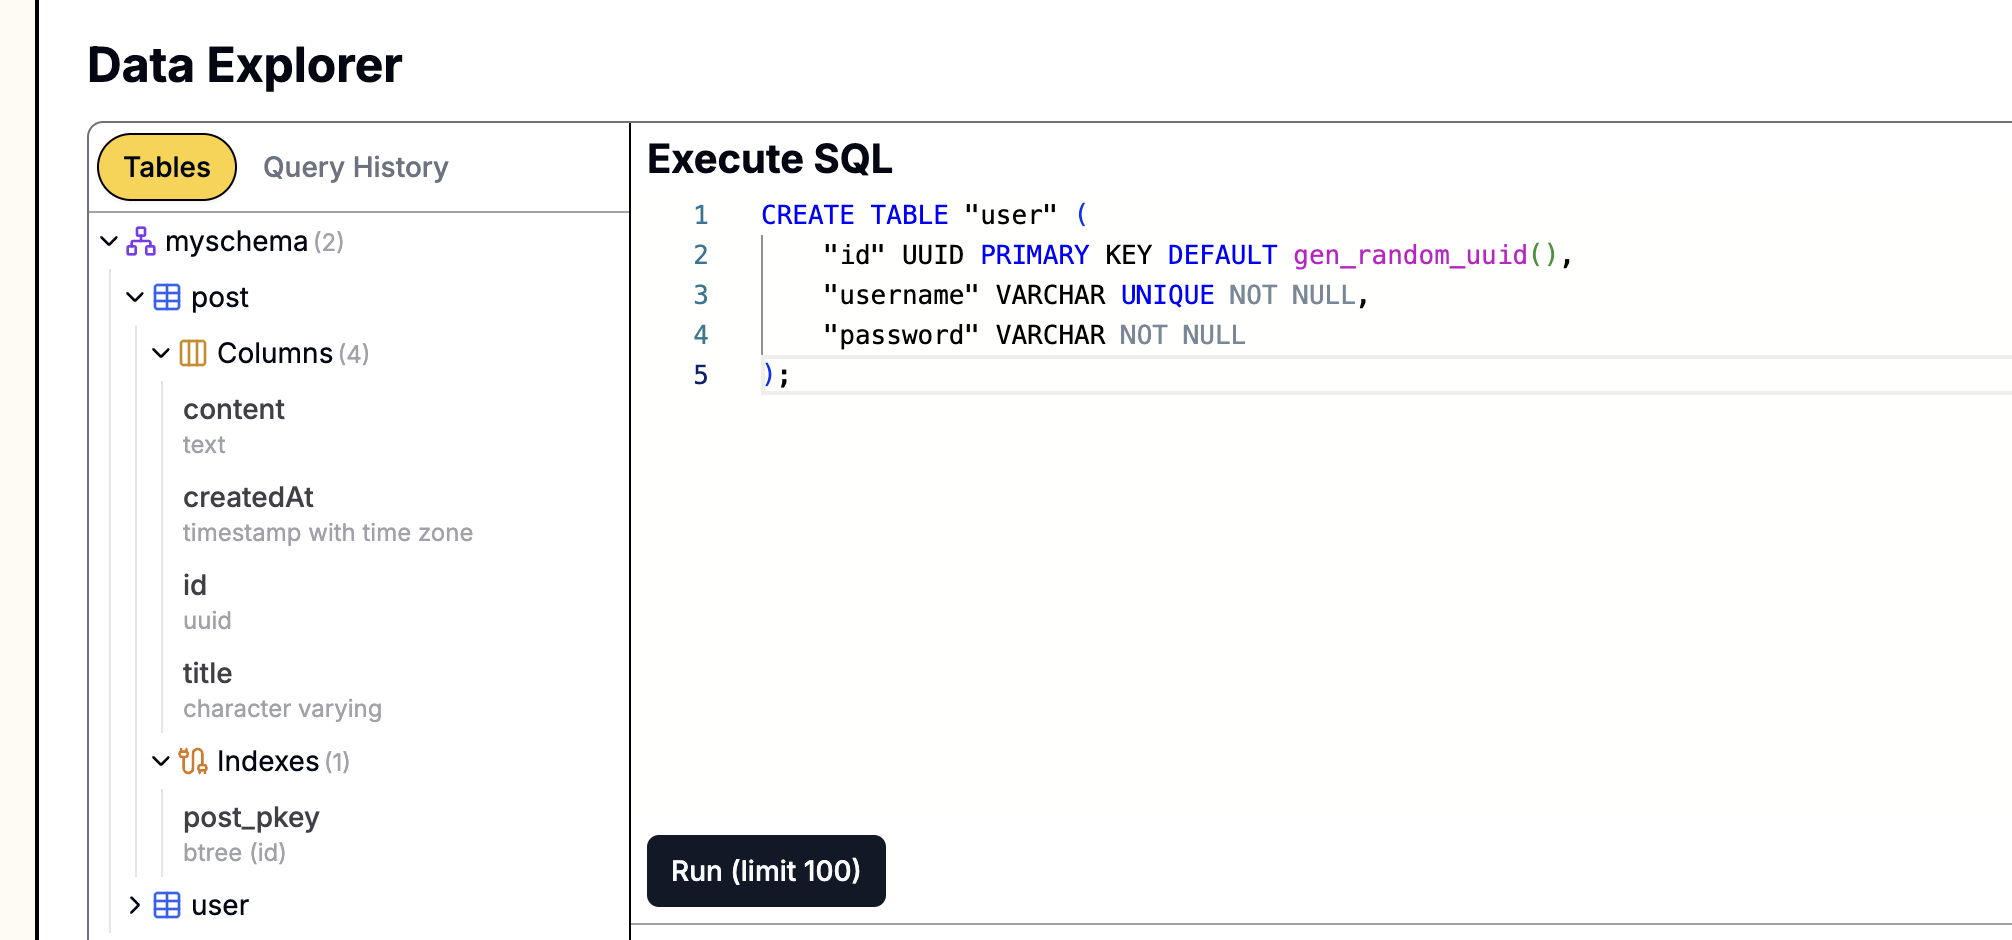
First, let's modify the structure of the comment table to add a parentId field, which will point to the ID of its parent comment.
Execute the following ALTER TABLE statement in your PostgreSQL database:
ALTER TABLE "comment"
ADD COLUMN "parentId" UUID REFERENCES "comment"("id") ON DELETE CASCADE;
- The
parentIdcolumn is optional (allowsNULL) because top-level comments do not have a parent. REFERENCES "comment"("id")creates a foreign key that linksparentIdto theidcolumn of the same table.
If your database is created on Leapcell,

you can easily execute SQL statements using the graphical interface. Simply go to the Database management page on the website, paste the above statement into the SQL interface, and execute it.
Update the Comment Entity
Open the src/comments/comment.entity.ts file and add the parent and replies properties to reflect this hierarchical relationship in the code.
// src/comments/comment.entity.ts
import { Entity, Column, PrimaryColumn, CreateDateColumn, ManyToOne, OneToMany } from 'typeorm';
import { User } from '../users/user.entity';
import { Post } from '../posts/post.entity';

@Entity()
export class Comment {
  @PrimaryColumn({ type: 'uuid', default: () => 'gen_random_uuid()' })
  id: string;

  @Column('text')
  content: string;

  @CreateDateColumn()
  createdAt: Date;

  @ManyToOne(() => User, (user) => user.comments)
  user: User;

  @ManyToOne(() => Post, (post) => post.comments)
  post: Post;

  // --- New Fields ---

  @ManyToOne(() => Comment, (comment) => comment.replies, { nullable: true })
  parent: Comment; // Parent comment

  @OneToMany(() => Comment, (comment) => comment.parent)
  replies: Comment[]; // List of child comments (replies)
}
Step 2: Adjust the Comment Service
The service layer needs to be adjusted accordingly to associate a parent comment when creating a new comment and to structure the flat list of comments into a tree-like structure when querying.
Open src/comments/comments.service.ts and make the following changes:
// src/comments/comments.service.ts
import { Injectable } from '@nestjs/common';
import { InjectRepository } from '@nestjs/typeorm';
import { Repository } from 'typeorm';
import { Comment } from './comment.entity';
import { Post } from '../posts/post.entity';
import { User } from '../users/user.entity';

@Injectable()
export class CommentsService {
  constructor(
    @InjectRepository(Comment)
    private commentsRepository: Repository<Comment>
  ) {}

  // Modify the findByPostId method
  async findByPostId(postId: string): Promise<Comment[]> {
    const comments = await this.commentsRepository.find({
      where: { post: { id: postId } },
      relations: ['user', 'parent'], // Load user and parent simultaneously
      order: {
        createdAt: 'ASC',
      },
    });
    return this.structureComments(comments);
  }

  // Add a new private method to convert the flat list into a tree structure
  private structureComments(comments: Comment[]): Comment[] {
    const commentMap = new Map<string, Comment>();
    comments.forEach((comment) => {
      comment.replies = []; // Initialize the replies array
      commentMap.set(comment.id, comment);
    });

    const rootComments: Comment[] = [];
    comments.forEach((comment) => {
      if (comment.parent) {
        const parentComment = commentMap.get(comment.parent.id);
        if (parentComment) {
          parentComment.replies.push(comment);
        }
      } else {
        rootComments.push(comment);
      }
    });

    return rootComments;
  }

  // Modify the create method to accept an optional parentId
  async create(content: string, user: User, post: Post, parentId?: string): Promise<Comment> {
    const newComment = this.commentsRepository.create({
      content,
      user,
      post,
      parent: parentId ? ({ id: parentId } as Comment) : undefined,
    });
    return (await this.commentsRepository.save([newComment]))[0];
  }
}
Logic Explanation:
findByPostIdnow fetches all comments for a post (including top-level comments and all replies).- The new
structureCommentsmethod is the core of the logic. It iterates through all comments. If a comment has aparent, it is placed into therepliesarray of its parent comment; otherwise, it is a top-level comment. - The
createmethod now has an optionalparentIdparameter. If this ID is provided, the newly created comment will be associated with the corresponding parent comment.
Step 3: Update the Controller
The controller needs to receive the optional parentId from the request body and pass it to the service. This change is very simple.
Open src/comments/comments.controller.ts:
// src/comments/comments.controller.ts
import { Controller, Post, Body, Param, Req, Res, UseGuards } from '@nestjs/common';
// ... imports

@Controller('posts/:postId/comments')
export class CommentsController {
  constructor(private readonly commentsService: CommentsService) {}

  @UseGuards(AuthenticatedGuard)
  @Post()
  async create(
    @Param('postId') postId: string,
    @Body('content') content: string,
    @Body('parentId') parentId: string, // <-- Receive parentId
    @Req() req: Request,
    @Res() res: Response
  ) {
    const { user } = req.session as any;

    // Pass parentId to the service
    await this.commentsService.create(content, user, { id: postId } as any, parentId);

    res.redirect(`/posts/${postId}`);
  }
}
Step 4: Upgrade the Frontend View
This is the part with the most changes. We need to update the post.ejs template to recursively render comments and their replies. We also need to add some JavaScript to dynamically show the reply form.
Create a Comment Template
To achieve recursive rendering of comments, the best practice is to create a reusable "partial" template for a comment.
Create a new file _comment.ejs in the views directory:
<% comments.forEach(comment => { %>
<div class="comment-item" style="margin-left: <%= depth * 20 %>px;">
  <p class="comment-content"><%= comment.content %></p>
  <small>
    By <strong><%= comment.user.username %></strong> on <%= new Date(comment.createdAt).toLocaleDateString() %>
  </small>
  <% if (user) { %>
  <button class="reply-btn" data-comment-id="<%= comment.id %>">Reply</button>
  <% } %>
</div>

<% if (comment.replies && comment.replies.length > 0) { %>
  <%- include('_comment', { comments: comment.replies, user: user, post: post, depth: depth + 1 }) %>
<% } %>
<% }) %>
This template iterates through the passed comments array and recursively calls itself for each comment's replies array, while increasing the depth to achieve stylistic indentation.
Update post.ejs
Now, let's modify views/post.ejs to use this new _comment.ejs partial and add a universal reply form.
<section class="comments-section">
  <h3>Comments</h3>

  <div class="comment-list">
    <% if (comments.length > 0) { %>
      <%- include('_comment', { comments: comments, user: user, post: post, depth: 0 }) %>
    <% } else { %>
    <p>No comments yet. Be the first to comment!</p>
    <% } %>
  </div>

  <% if (user) { %>
  <form id="comment-form" action="/posts/<%= post.id %>/comments" method="POST" class="comment-form">
    <h4>Leave a Comment</h4>
    <div class="form-group">
      <textarea name="content" rows="4" placeholder="Write your comment here..." required></textarea>
      <input type="hidden" name="parentId" id="parentIdInput" value="" />
    </div>
    <button type="submit">Submit</button>
    <button type="button" id="cancel-reply-btn" style="display: none;">Cancel Reply</button>
  </form>
  <% } else { %>
  <p><a href="/auth/login">Login</a> to leave a comment.</p>
  <% } %>
</section>

<script>
  document.addEventListener('DOMContentLoaded', () => {
    const commentForm = document.getElementById('comment-form');
    const parentIdInput = document.getElementById('parentIdInput');
    const formTitle = commentForm.querySelector('h4');
    const cancelReplyBtn = document.getElementById('cancel-reply-btn');
    const commentList = document.querySelector('.comment-list');

    commentList.addEventListener('click', (e) => {
      if (e.target.classList.contains('reply-btn')) {
        const commentId = e.target.getAttribute('data-comment-id');
        const commentItem = e.target.closest('.comment-item');

        // Move the form to below the comment being replied to
        commentItem.after(commentForm);

        // Set the parentId and the form title
        parentIdInput.value = commentId;
        formTitle.innerText = 'Replying to ' + commentItem.querySelector('strong').innerText;
        cancelReplyBtn.style.display = 'inline-block';
      }
    });

    cancelReplyBtn.addEventListener('click', () => {
      // Reset the form state
      parentIdInput.value = '';
      formTitle.innerText = 'Leave a Comment';
      cancelReplyBtn.style.display = 'none';

      // Move the form back to the bottom of the comments section
      document.querySelector('.comments-section').appendChild(commentForm);
    });
  });
</script>

<%- include('_footer') %>
Logic Explanation:
There is only one comment form on the page.
When a user clicks the "Reply" button on a comment, the ID of that comment is retrieved and set in the hidden parentId input field of the form. The entire form is also moved to be directly below the comment being replied to.
The reply form will show a "Cancel Reply" button. Clicking "Cancel Reply" or submitting the form will reset the form and move it back to its original position.
Run and Test
Restart your application:
npm run start:dev
Open your browser and navigate to: http://localhost:3000/
Find a comment on a post and click the "Reply" button. You will see a reply form appear below the comment.
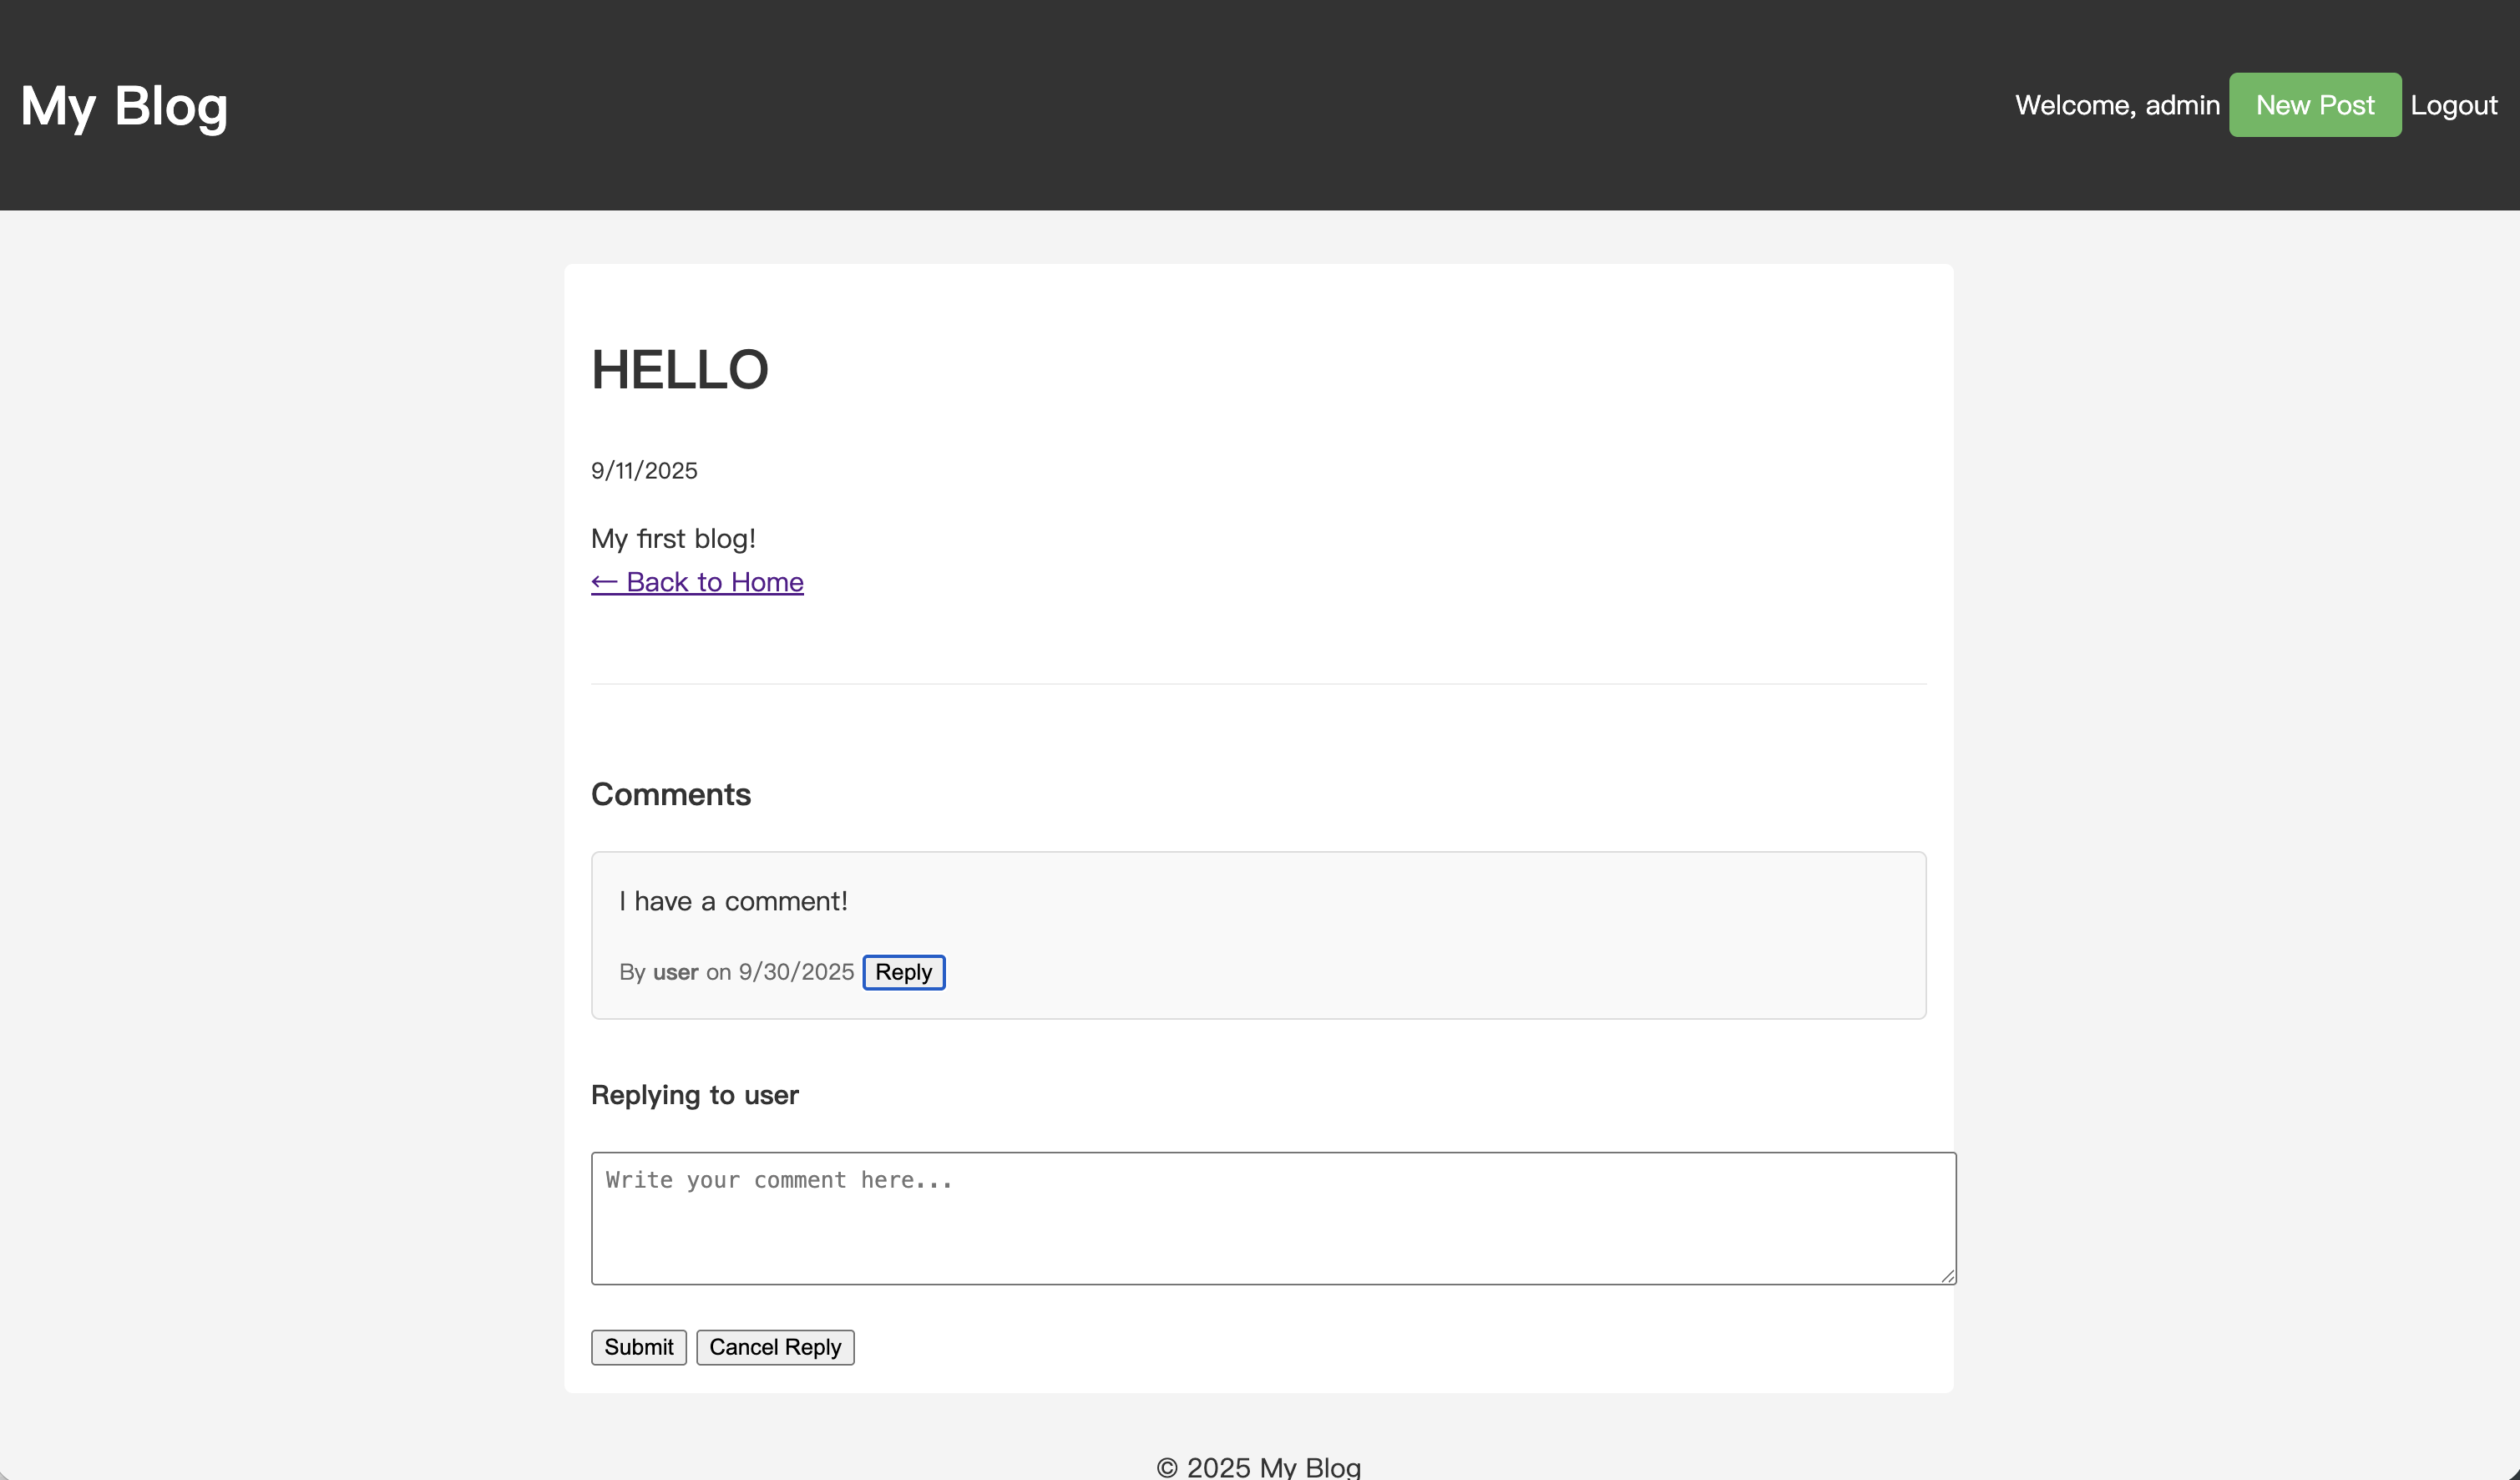
Enter your content and submit. After the page refreshes, you will see your reply displayed indented below the parent comment.
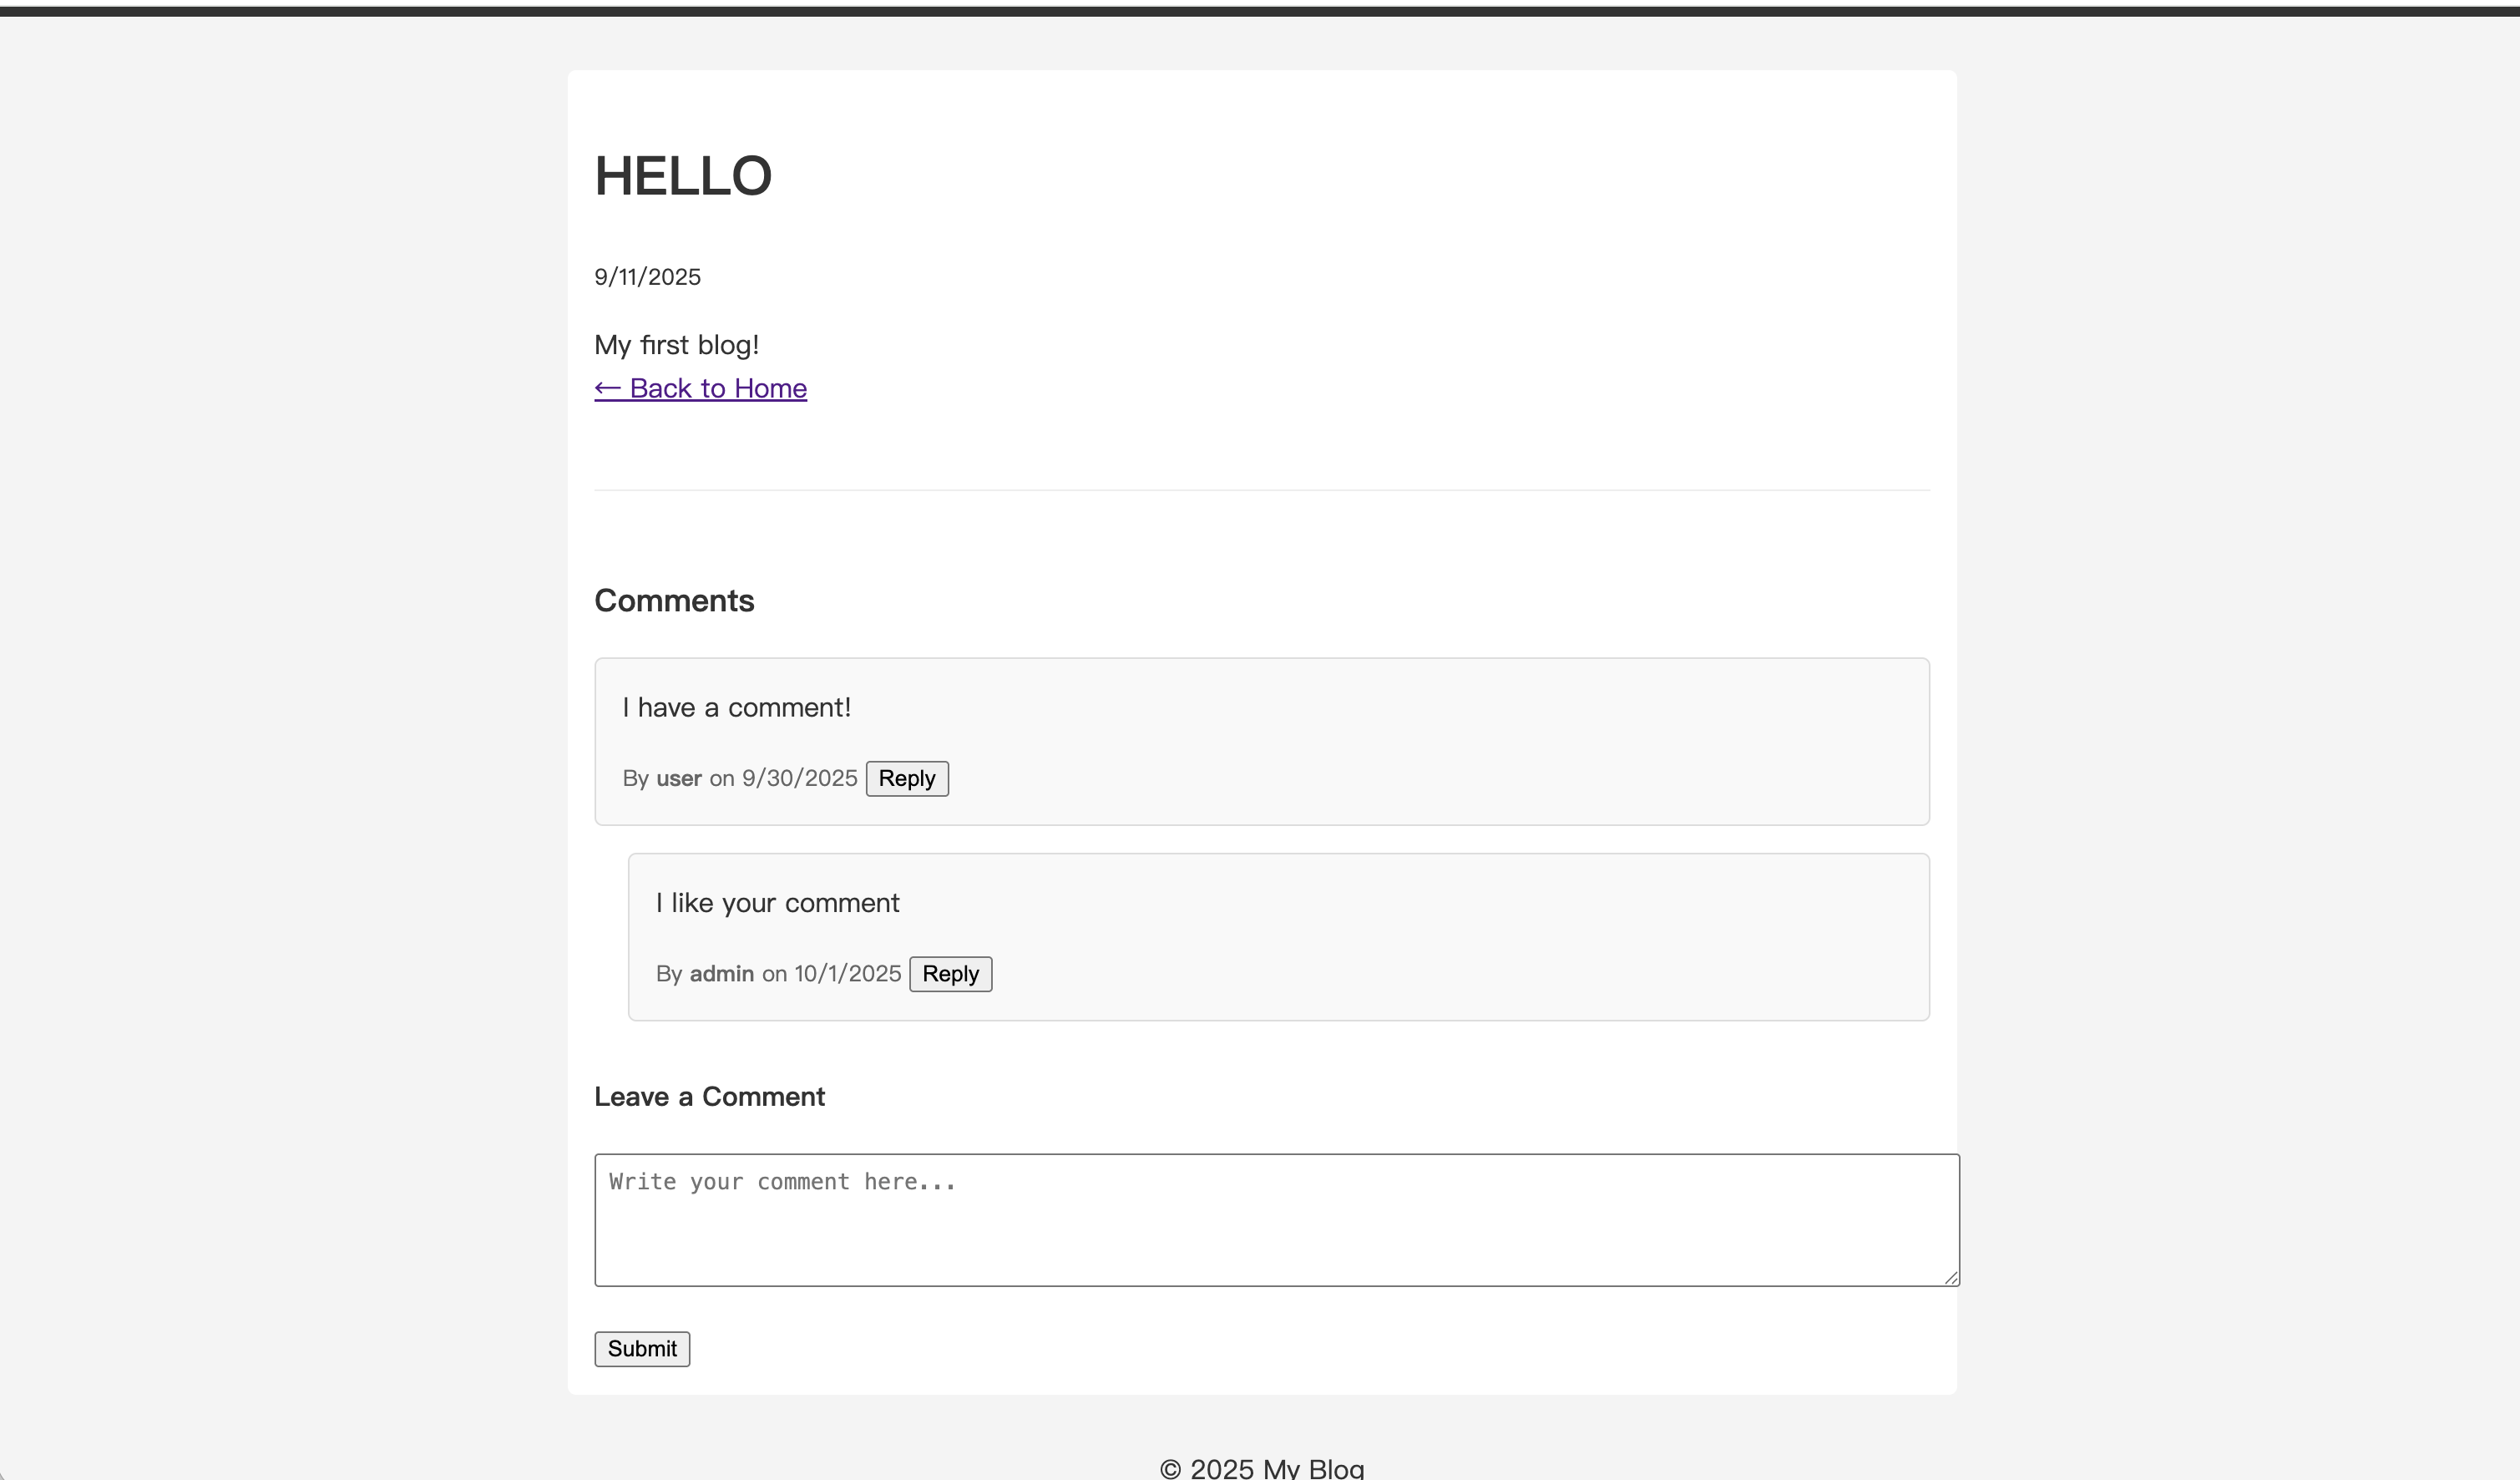
You can continue to reply to replies, creating multiple levels of conversation.
With this, you now have a complete comment reply system.
Previous Tutorials: